Get your vario in time for Christmas: order now before Thursday 12 December 12:00
Menu
leGPSBip calibration procedure
Instantaneous vario requires calibration of the sensors by the user for optimum performance, with the help of an object to obtain the necessary orientation. This can be a pen, book, eraser or any other non-slip object.
The calibration procedure starts automatically when the software is updated to V3.x.
Caution: perform the calibration procedure on a perfectly stable surface, in a calm environment (no vibration, music or other movement...).
PROCEDURE
Once the update is complete, follow these steps:
STEP 1
Switch on the device and wait for it to announce "calibration procedure".
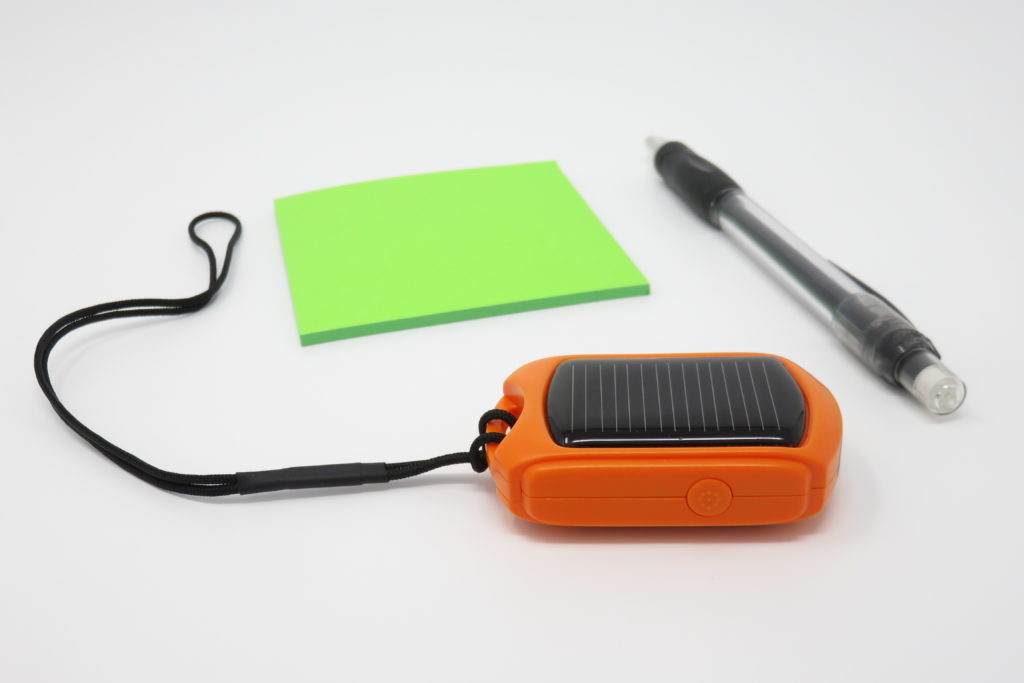
Lay the device horizontally, with the solar cell facing upwards.
Stay put and wait for validation.
STEP 2
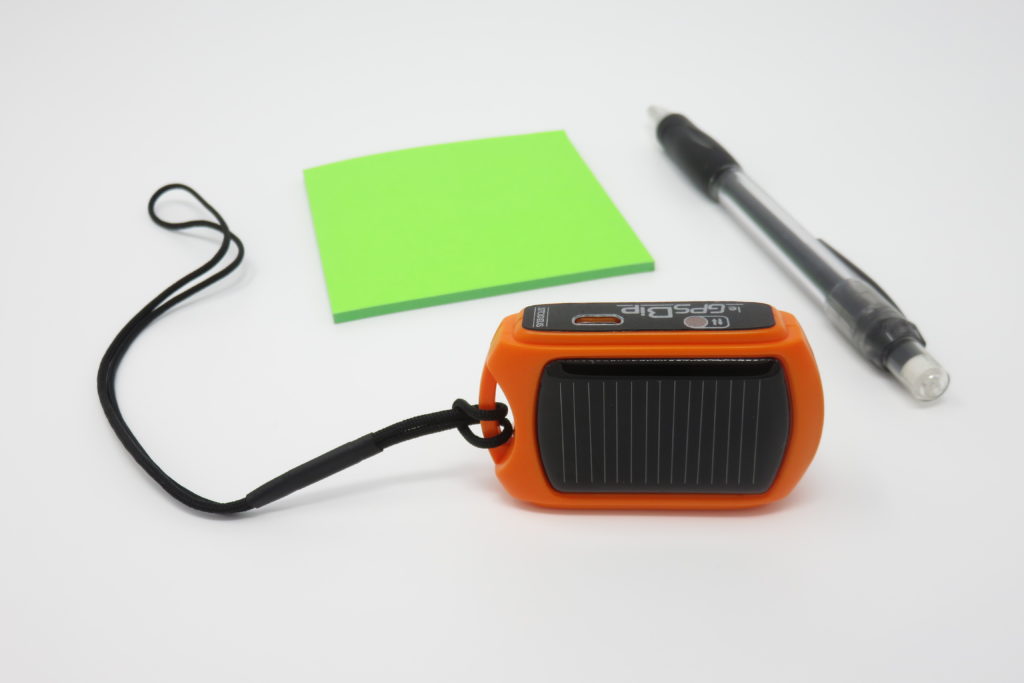
Change position: Place it with the USB port facing upwards (Warning: do not press the button).
Stay put and wait for validation.
STEP 3
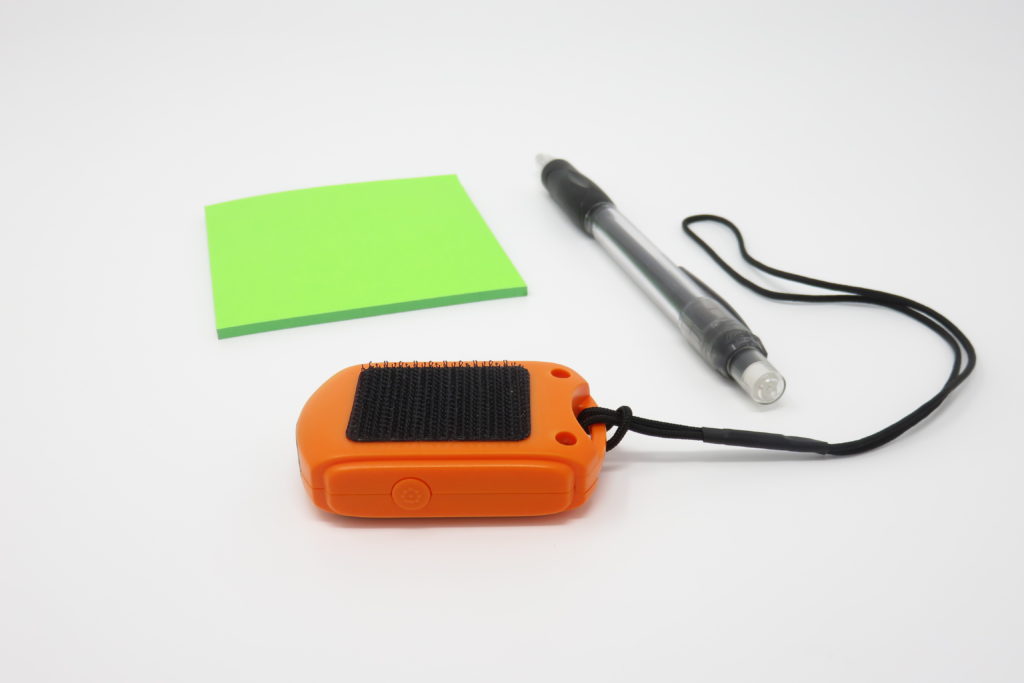
Change position: Place it with the Velcro facing upwards.
Stay put and wait for validation.
STEP 4
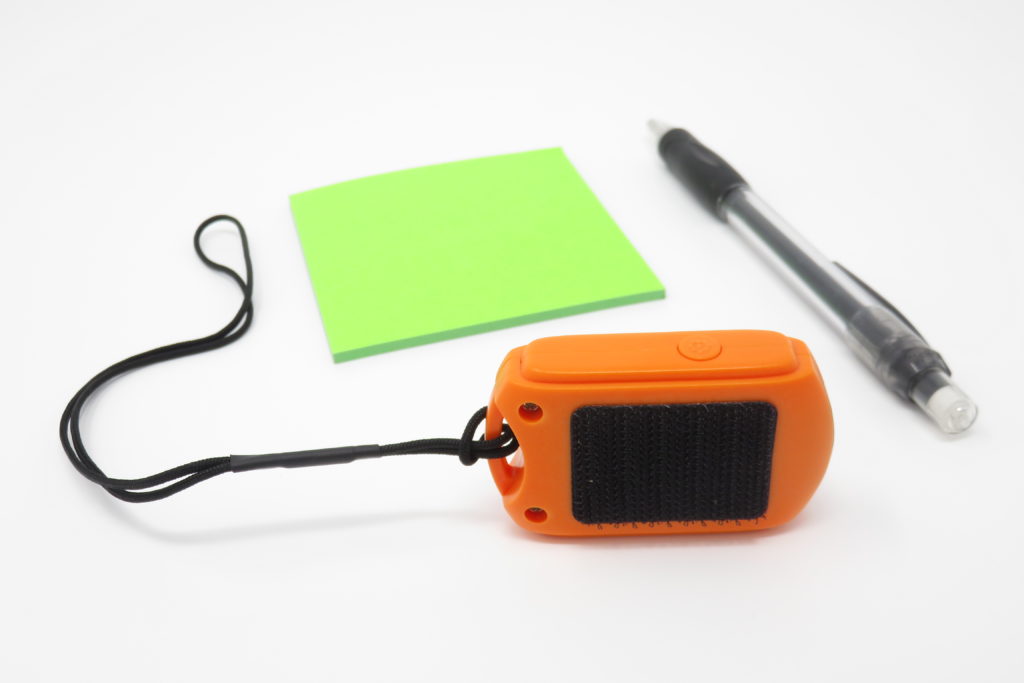
Change position: Place it with the button facing upwards.
Stay put and wait for validation.
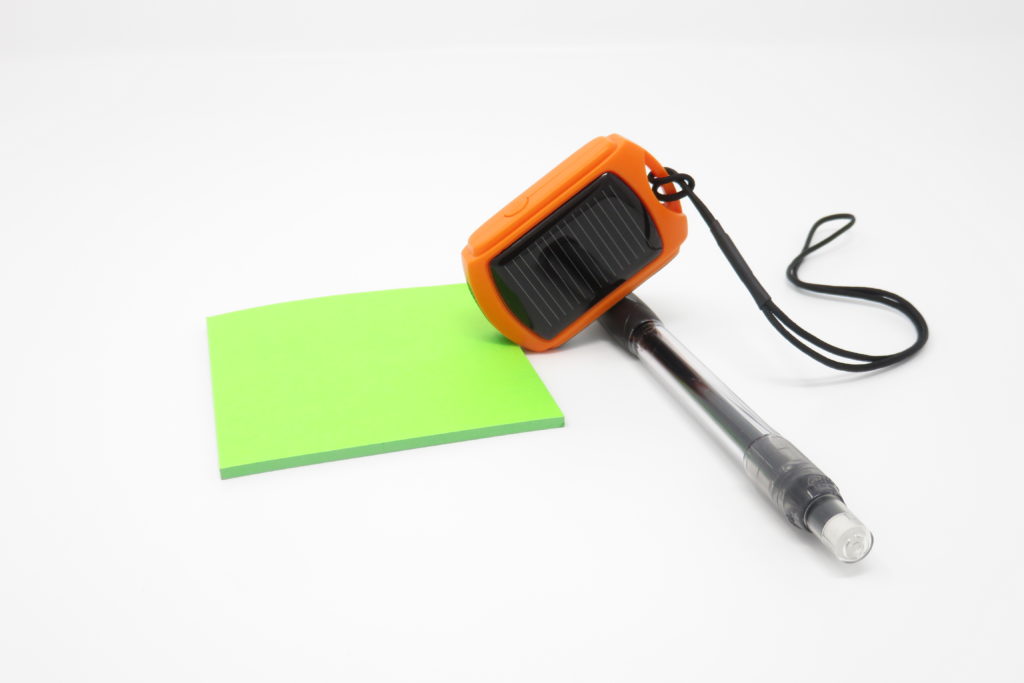
STEP 5
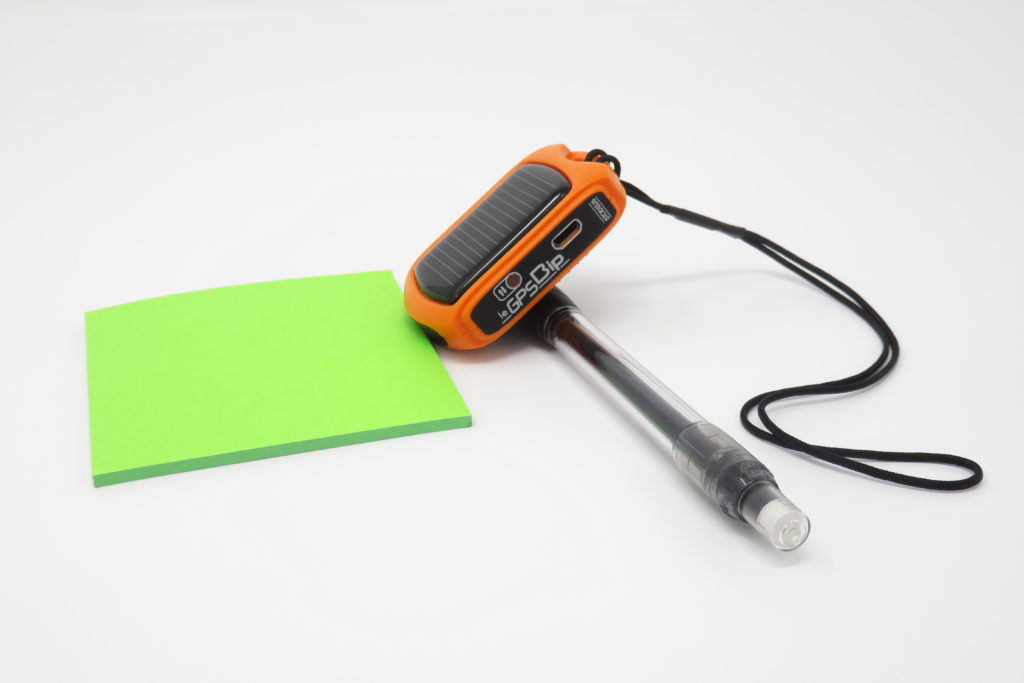
Using an object (such as a pen or eraser), place it at a 45° angle with the solar cell and the handle facing upwards (we recommend using a second object to prevent it slipping).
Stay put and wait for validation.
STEP 6
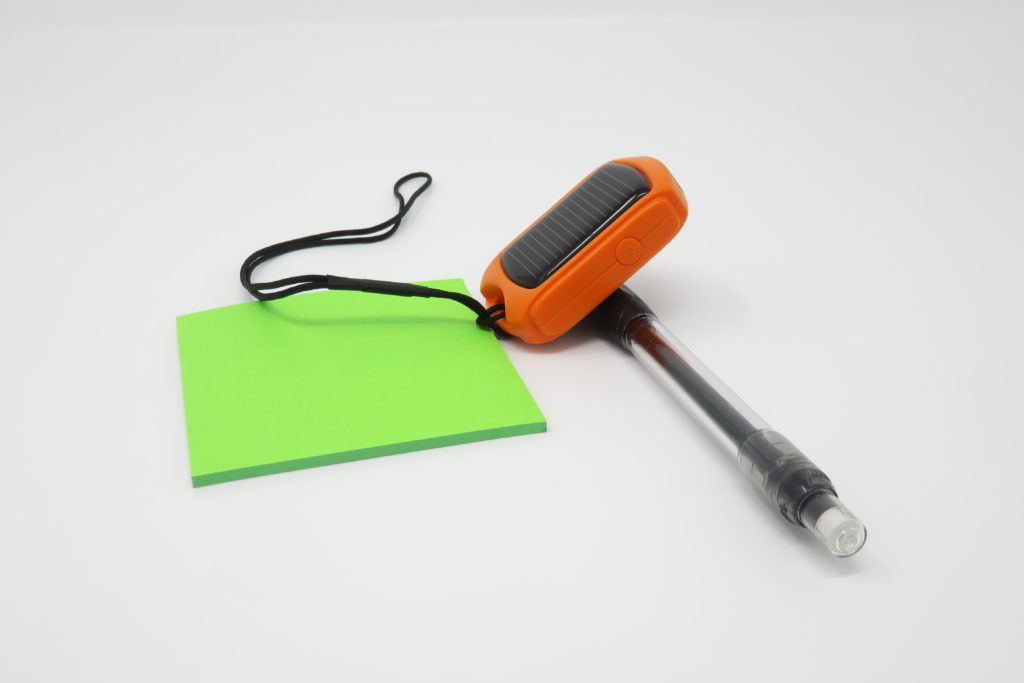
Change position: Position at 45° with the solar cell and grille facing upwards.
Stay put and wait for validation.
STEP 7
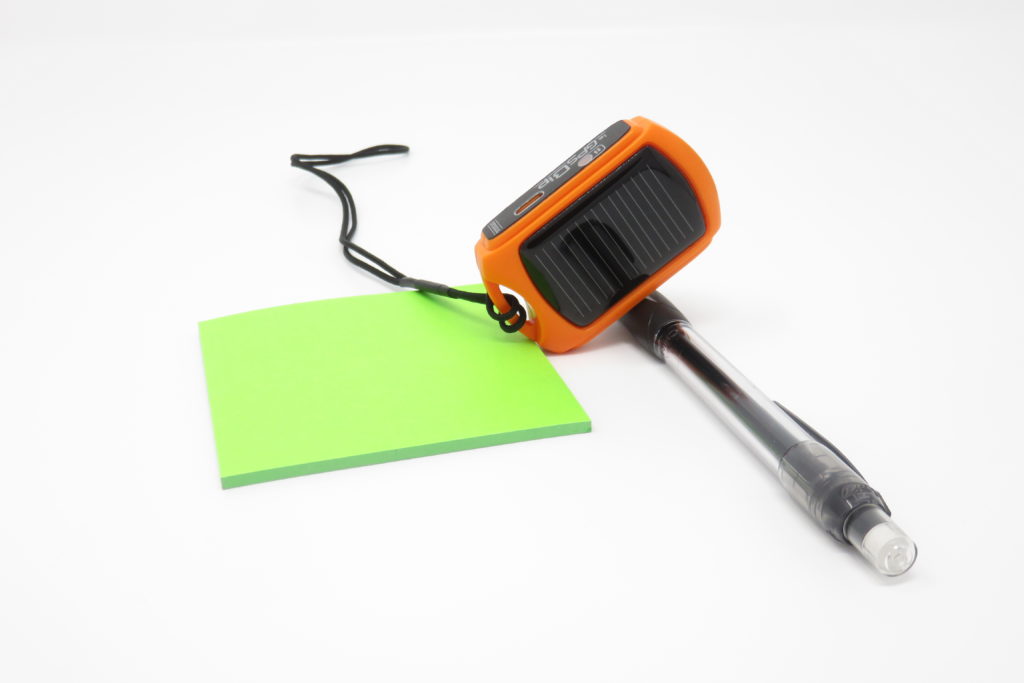
Change position: Place it at a 45° angle with the USB port and grille facing upwards.
Stay put and wait for validation.
STEP 8
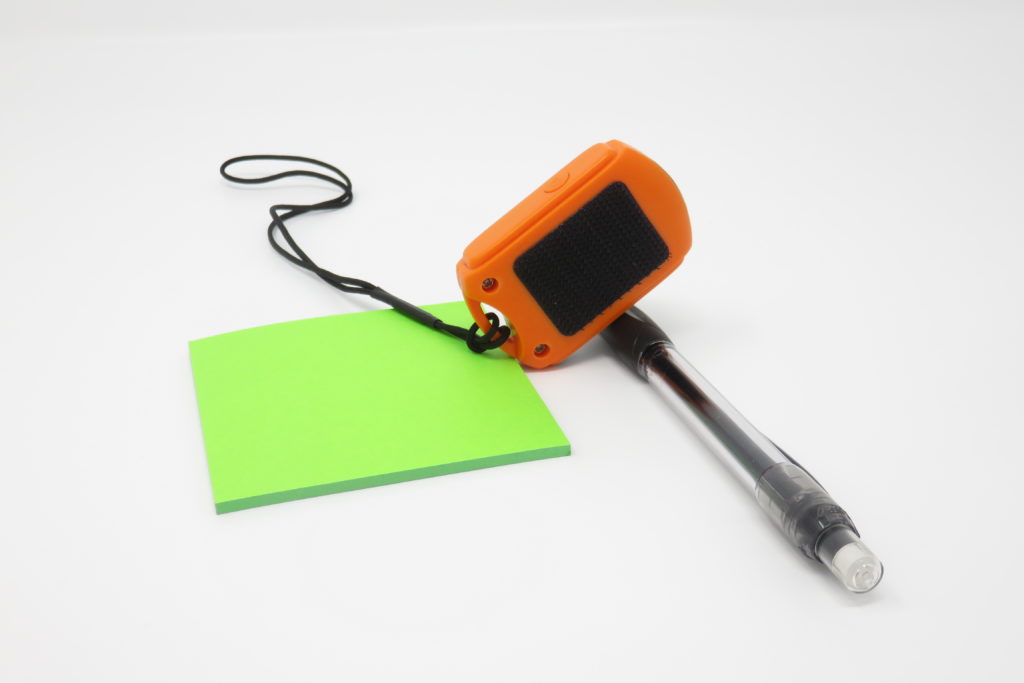
Changing the position: Place it at 45° with the knob and grille facing upwards.
Stay put and wait for validation.
STEP 9
Change position: Position at 45° with the knob and handle facing upwards.
Stay put and wait for validation.
STEP 10: repeat STEPS 1 to 9
Once these steps have been completed, start the validation procedure all over again.
Finally, we'll let you know how successful the calibration has been. Happy flying!